Tuesday, May 31, 2011

I've Got EGGS, Now What Do I Do With Them?

Without further ado as promised...

Here is part 2 of my mini-series on eggs. 

For PART 1, how to make the perfect Baked Eggs, click here for my post Got EGGS. 

Following you will find a step-by-step guide to making your own Delectable Deviled Eggs (in pictures)!


Carefully slice the eggs in half and place the yolks in a bowl.  I only made six eggs so I used a cereal bowl.  Notice how there is NO icky green color around the edge of the yolk.  They are light, fluffy and delicious!
Beautiful yolks!
Mix together your favorite stuff.  I used mayonnaise,  yellow mustard, dill pickle relish, salt, pepper, and my secret ingredient-celery salt.  (You won't tell, will you?)  Really celery salt and eggs make a marvelous combination!

Mix with a fork until desired consistency.  The yolks are so soft and perfect that anything more than a fork is a waste of energy. 

Make a faux pastry bag with a quart-sized freezer bag and a pastry tip.   Just snip off a corner and jam the pastry tip through the hole.  Just don't make the hole too big! 
ready for filling
Put the pastry bag into a cup to help with the filling.


Fill!  You can make a big star shape or a swirl.  Or try something else, they're your eggs. 

Be generous with your filling.  I had a few tablespoons of filling left over. 
 I sprinkled the finished eggs with finely chopped chives and cayenne pepper for a little heat! 
Try to wait long enough to take the picture before you begin snacking!  It will be difficult!
Here is the "recipe" for Deviled Eggs

There are no quantities because I just put in a little of this and a little of that until it looks right.  


Delectable Deviled Eggs
  • baked eggs
  • mayonnaise
  • yellow mustard
  • dill pickle relish
  • salt 
  • pepper
  • celery salt
  • cayenne pepper
  • minced chives


Slice the eggs carefully in half longways.  Put the yolks in a bowl with the mayonnaise, mustard, relish, salt, pepper, and celery salt.  Blend well with a fork until smooth and creamy.  

Use a small portion scoop or pastry bag to fill the egg halves.


Garnish the tops of the eggs with cayenne pepper and chives.  


Serve well chilled.


Here is the "recipe" for my Potato Salad:


Here is the potato salad again.  It was a big hit at the preschool graduation potluck!
Tanya's Potato Salad
Again, the quantities are relative.  The above salad has 8 potatoes and 12 eggs.  I used 4 green onions in the sauce. 


boiled potatoes (any kind you like)  chilled
baked eggs
mayonnaise
yellow mustard
dill pickle relish
dill pickle juice
salt 
pepper
celery salt
green onions


Boil the potatoes until softened but not falling apart in the water.  Do NOT peel them.  The peel keeps you from getting mashed potatoes.  Boil until a butter knife inserted into a potato slips out easily without sticking.  Drain the cooking water and chill the potatoes.  


Once the potatoes are chilled you can peel them.  I never do.  I like the flavor and texture as well as the nutrients that the peels provide.  Dice the potatoes.  I cut each potato in half lengthwise twice into quarters and then into 1/2 inch increments from there.  Place the potatoes into a LARGE bowl. 


Grate the baked eggs into the bowl with the potatoes. 

In a separate bowl combine the remaining ingredients: mayonnaise, mustard, relish, pickle juice, salt, pepper, celery salt, and green onions.  Mix with a whisk until well combined.  


Fold the sauce into the potato/egg mixture.  Work carefully with a spoonula.  (This is a favorite kitchen gadget.  LOVE IT!)  This step is much easier if you have a large bowl to work in.  If the bowl it too small, it will be very difficult to get the sauce well dispersed throughout the potatoes and eggs. 


Pour the potato salad into a smaller bowl for serving. 


Chill for at least an hour to allow all of the flavors to combine.  Serve well chilled. 


Serve some of Tanya's Potato Salad or Delectable Deviled Eggs made with baked eggs at your next barbecue!


They will be great!


I would love it if you became a follower of the Greetings From the Asylum page on Facebook.  You will find a link on my sidebar!  


I will be linking up to these and other great link parties.  To see a complete list click here or on the Linky Parties button at the top of my blog.  


Thanks for visiting!  


Fantabulous Friday!


Photobucket

Miz Helen’s Country Cottage

Savvy Southern Style


Tuesday Night Supper Club

Todays Creative Blog


Monday, May 30, 2011

Got EGGS?

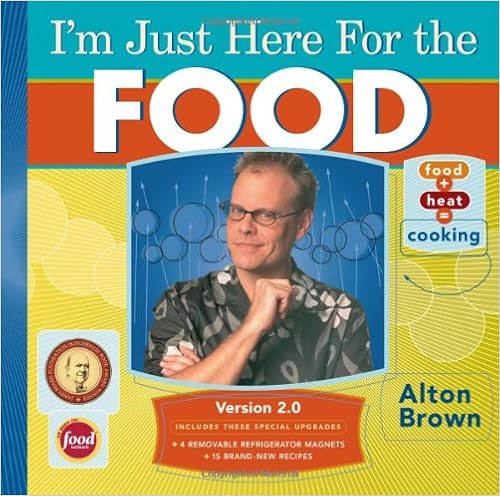
I love a good hard-boiled egg.  The emphasis here is on the word good.  It is SO hard to get a good hard boiled egg.  It is almost impossible.  I am forever grateful to Alton Brown for teaching me an easier way to make PERFECT hard-boiled eggs - don't boil them at all BAKE THEM!  A few years ago for some event I got this book (and you can too, just click the link)---

Add caption
This book is part recipe book/ part food science manual.  Alton goes into the how and why of cooking.   I was always good at Chemistry in high school and college so Alton Brown's descriptive science teacher style really communicated to me. 

Alton Brown's recipe for Baked Hard Cooked Eggs is the best recipe you can use.  You can find a printable version of this recipe - click here. (I found it on Food.com.)  Baked eggs are better because they are less sulfurous (smelly) and the texture of the finished eggs is creamier.  They are really delicious!  You will be amazed!

Alton Brown's Baked Eggs

Prep Time: 2 min.
Total Time: 32 min.

Ingredients: 

2 - 4 dozen eggs

Directions:


  1. Preheat the oven to 325 degrees.  Position the oven racks in the center of the oven.
  2. Place the eggs parallel to the bars on the racks.  (see picture below)
  3. Place a baking sheet pan in the bottom of the oven (just in case an egg breaks).  I have never had a mess in my oven in all the times I have made this recipe.  I have had eggs break, but they cooked inside when they do so there is no mess
  4. Bake for 30 minutes.
  5. When the eggs are done, fill a large bowl with ice water and move the eggs into the bowl.  I do this a few minutes ahead of time to make sure the water is COLD!
  6. Peel the eggs as soon as they're cool enough to handle, then return them to the ice water to thoroughly chill.  I think that the eggs are easier to peel if they are allowed to chill in the water for at least 10 minutes.  Also, I peel the eggs under cool running water.  
 This recipe works best with the freshest eggs you can find.

Here are some photos of the process:
See? Parallel to the bars of the rack.  I baked them for YEARS going the other way and I was always worried that they were going to roll around and break.  Sheesh!  I wish I'd figured out this little bit of Physics before. 

Prepping the ice water.  As you can see, I needed to get rid of the strange icy clump in the bottom of my ice dispenser.  It worked very nicely.  Thank you for asking. 

Close Up!  These brown spots on the shells are NORMAL!  They dissolve right off in the ice water. 

Remove the eggs from the oven with spring-loaded tongs or  a heavy duty oven mitt. 

Chilling in the ice water.  See the egg in the bottom right corner, the brown spots are disappearing right before your eyes. 

Store the eggs in an airtight container in the refrigerator.  There are small brown spots on the egg whites.  This is NORMAL and does not affect the flavor of the eggs. 
Now that you have these eggs, what can you do with them?  How about this:


Yummy, Yummy Potato Salad
 or some of these:


Delectable Deviled Eggs


Come back tomorrow for Part 2 of my mini-series on EGGS.  I will share my recipes for Delectable Deviled Eggs and Tanya's Potato Salad.  Delicious!  I can hardly wait!  

To see part 2 of my egg miniseries click HERE

UPDATE: If you only need to make a few eggs, I show you Alton Brown's method for steaming eggs HERE.  The eggs are not quite as great as baking them, but they are still drool-worthy! Check it out!  

Elsewhere at The Asylum, I share my recipe for egg salad HERE. I even made some crafty eggs for Easter HEREBUT - If you really, really want to boil your eggs - I show you how I boil mine HERE!

I would love it if you became a follower of the Greetings From the Asylum page on Facebook.  You will find a link on my sidebar!  You can also follow me on Pinterest! (We all LOVE Pinterest!)


I will be linking up to these and other great link parties.  To see a complete list click here or on the Linky Parties button at the top of my blog.  


Thanks for visiting! 

Friday, May 27, 2011

Fun In a File Folder

*sung to the tune of "Love In an Elevator" by Aerosmith*

Fun in a file folder,
Spreading the pieces on the ground.
Fun in a file folder,
Smiles on faces can be found.

Fun in a file folder,
Learning new stuff makes Mom so proud.
Fun in a file folder,
Just keep your voices not too loud.

I'll stop now, but you get the point...

Back before my son was born I bought a book of file folder games from a local teacher supply store.  I thought it would be useful for my kids.  I bought a book designed by Frank Schaffer.  Inside I found games about seasons, colors, letters, numbers, shapes, opposites, and matching.  All of the pages were white, single-sided black line masters just waiting to be colored, laminated, and mounted in a file folder.  I bought some fun file folders such as these available at Office Max or these at Staples.  Then I got to work coloring, and coloring, and coloring.  The book had 45 games.  Each game had at least 4 sheets to color.  It took a looooooong, looooooong time to finish.  Then there was the cutting, gluing, and cutting again after the lamination was complete.  The finished games are beautiful (if I do say so myself) and my children love them. 

Alright, I know you want to see some photos.  Here they are...

I had the file folders three-hole drilled before I mounted the games inside to make sure none of the pictures would be damaged.  

The finished games filled three large three-ring binders. 
I mounted the game title on the tab and the directions on the front cover.  Some of the games had a title that I mounted on the front cover as well.  You can see one of those in the upper photo. 

On the back cover I mounted the answer key and a clear plastic CD holder to store each game's pieces. 
Number game

Color game

Matching game


Body part matching game (I colored this so long ago that the Diamondbacks were still wearing turquoise and purple.)

Opposites game
Yeah, the pictures are all well and good, but do the kids enjoy them.  That is all that really matters, right?  Right!  Well, they LOVE them as you will see...

Here is the boy.

Here is the girl.

The boy.

The girl's toes.  They were too cute to pass up. 

Both of them playing together.  They trade games back and forth.

She wanted a carrot close-up.

Easy to take the pieces out. 

Easy to play.

It's a match!

Easy to put away. 

These pieces are the only ones in the whole book that are too large to fit in the CD holder.  Still, they stay in just fine. 
This was a massive project, but I have never regretted doing it.  My kids want to play these games nearly every day.  I can't let them have free reign of the folders.  If I did, the pieces would be one big jumble of pieces.  You know how it is!

Nowadays, you can by a book of games with pre-colored pages.  That takes a big bite out of the time commitment needed to complete a project like this.  So there you have it...you can make file folder games for your own children, grandchildren, or students!  I encourage you to!

Greetings From the Asylum has a page on Facebook.  There is a link on my sidebar, or click HERE! I am also on Pinterest HERE!

If you enjoyed this post, you might like these other posts from Greetings From the Asylum:  Kids Document Keeper, Pencil Bouquet Teacher Gift, and Hide and Seek Bag.

Thanks for visiting!